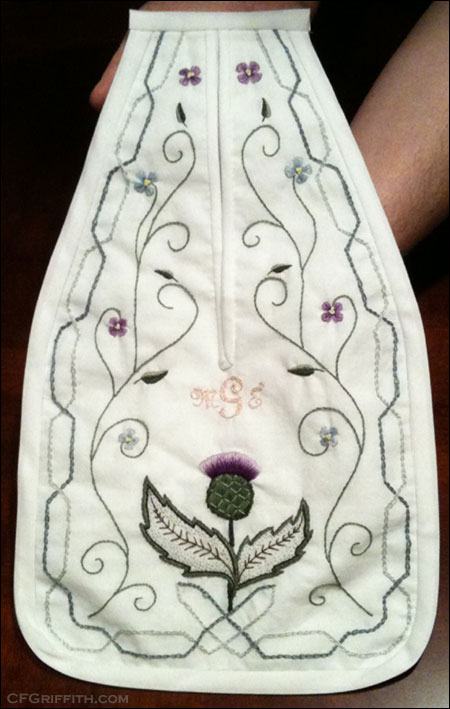
 Finally! It took me a little longer than I’d wanted, but I finally finished my first embroidery project! I took a short break to enjoy the holidays, and then my husband and I re-organized things and did a little cleaning to make more space. I also wanted to make a few decisions on how to finish those final details.
The project
I decided to make my first embroidery project my 18th century pocket (hopefully there will be a second pocket in the near future). I figured, if I ended up making a mess or if the design stood out as being too “off” then it wouldn’t matter anyway — the pocket will be hidden under my petticoats and hoops.
I used the pocket pattern from the Patterns of Fashion 1: 1660 – 1860, by Janet Arnold.
Although I have an embroidery book covering 18th century embroidery, I decided to not worry about that detail and just work on a design that came to mind when I started working on my 18th century garments. It also would give me a chance to try learning a few different stitches, as well as using some very simple and quick stitches to help fill the space. The initials are for my character’s name. The neat thing about that is I can always just embroider the last initial (G) on other projects, and it can be for my own last name or my character’s last name (different names that start with the same letter).
I learned the stitches from Mary Corbet’s Needle ‘N Thread website. If you’re interested in learning embroidery — definitely check it out. It was a HUGE help.
The materials
For the actual pocket fabric, I used the same white cotton fabric I have been using on our under garments so far. The embroidery floss was DMC cotton floss. I created the embroidery pattern on a separate piece of paper, and then traced it to the fabric with a pencil using my lightbox.
I definitely “learned by doing”
Many times, I like to practice things before I apply them to my actual projects. While I did practice a few stitches to convince myself it would be worthwhile to order the embroidery frame and try this, most of it was on-the-spot learning. I watched the videos or step-by-step instructions, and then picked up the project itself and gave it a try. Sometimes it worked great, and sometimes it wasn’t so good.
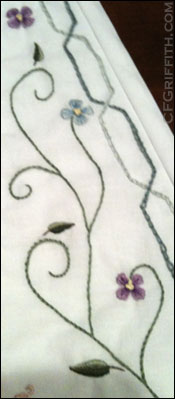
There are sections that are a little sloppy (maybe I rushed that section too much, or got off on my stitch length, or paid a little too much attention to the TV). There are sections I wish I could fix, like the part just under the thistle. There are also sections I absolutely adore, even with their little mistakes (the scrolling vines with leaves and flowers).
Things to work on for next time
I definitely need to keep practicing — that’s a given since I just started learning. I don’t see myself doing embroidery all the time, or some types of embroidery, but for things like this it’s so enjoyable!
I look forward to using better fabric and floss. I also would like to buy some beeswax to prepare the floss and keep it from snagging, knotting, and catching so much.
I had such a time deciding which colors to use (I couldn’t find enough differing shades in the colors I needed). It seemed like such a huge difference between deciding with the floss bundled or laid out side-by-side, and then actually stitched on the project. Something I thought would be too dark wasn’t dark enough, or I could have used shades that had even more of a dark/light difference between them. I look forward to getting more used to choosing colors, as well as stitches, and even how many strands of floss to use.
I also look forward to spending more time researching actual 18th century designs and learning to be more accurate.
It was a blast, and I’ve actually learned to enjoy embroidery. I’ve come a long way since my first attempts as a kid making a mess and not knowing what I was doing.

My first embroidery project: 18th century pocket (although I did not focus on an 18th century design).


It was an ambitious first project, and I know you learned a lot along the way. I loved seeing it progress from sketches to a finalized design and then finally embroidered art.
The blending of colors in the thistle and flowers can’t really be seen in the photos as much as they pop out in real life.
I know there were times you were concerned that parts may have seemed too crowded or too sparse, but the balance of it all now that it’s finished and cut down to size is great!
I’ve had a blast watching the piece come together and can’t wait to see what you do next, now that you’re even more comfortable with embroidery and learned a lot on this pocket.
Although the pictures show a beautiful piece of art, in “real life” it’s pretty incredible. To think it’s your own design, freehand and that you chose and blended the colors yourself just blows me away. Thanks so much for bringing it to show me so I could appreciate the full impact of its beauty. Wowza!
This is so beautiful! Give yourself some major pats on the back!
Thanks so much, everyone! It’s so funny — I never thought I would have the time to give this a try, much less actually figure it out. Isn’t the Internet so wonderful? You’ve got to love the technology that’s out there, letting people like me figure out “oooh, so THAT is how it’s done!” And yes, it’s difficult to see all the colors that went into it. The little leaves and flowers have a few different colors in them. Actually, working in such small space with soooo many stitches were part of why I’ve now sworn to get myself some beeswax. Lots of catching and knotting annoyances.
What a wonderful project and I love your description of the process for yourself. The design is perfect for the piece. And yes… beeswax will make it easier ( a memory from LONG ago! ).
Thanks Jaci! I haven’t gone to Joann Fabrics yet (or any other store that would have embroidery items), but I assume beeswax might be sold there somewhere near the embroidery-type sections? How do you use it? Do you just pass the thread across the block of wax and lightly coat it? Thanks so much for the reply! 🙂
Cynthia, that is absolutely stunning! You should be very proud.
oh, you might want to try a product called “thread heaven” its a bit better than beeswax. I don’t know if you are trying to keep your materials historically accurate as well, but if not, give it a try.
Thanks Ali! 🙂 And I did actually buy some Thread Heaven today. I’ve been reading a few things and decided to give that a try first. Thanks for the recommendation! It’s always nice to see more votes in favor of things you’re wanting to try. Best wishes!