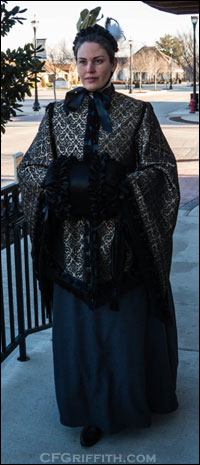
Scroll down this page to see more in-progress and finished photos.
Patterns Used:
– Truly Victorian TV500 Talma Wrap.
Fabrics Used:
– Gold and black (upholstery? contents unknown) fabric.
– Brown felt.
– Silver china silk lining.
– Black cotton.
Other Materials Used:
– Black, large hooks and eyes.
– Black fringe trim.
– Black 1.5 inch ribbon.
– Iron-on interfacing.
A mixture of machine and hand sewing.
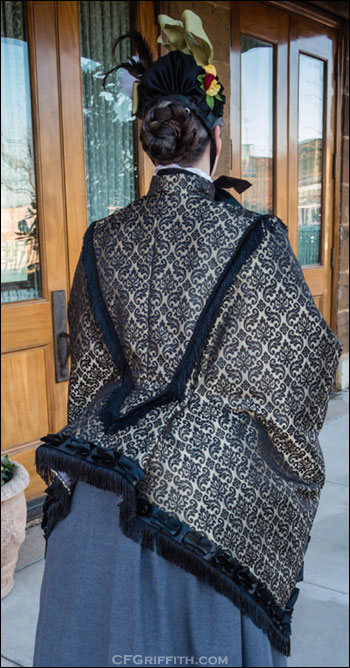
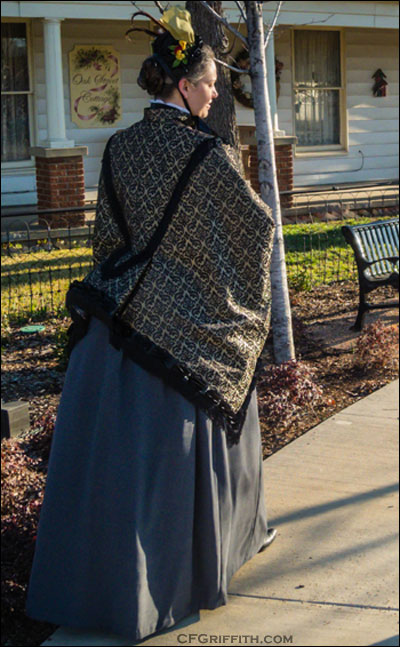
This was actually a fun pattern to make. Since I’ve made a few TV bodices, I didn’t bother with a mock-up. This has a fitted back (a tie around the waist makes it cling against the back and the bustle), but the front and sides are loose. I just made sure not to worry too terribly much about tightly fitting everywhere like I normally would. I want to be able to comfortably wear bulky bodices underneath. I hope I didn’t leave the area in the upper chest and throat area too loose, but again I didn’t want any frilly bodices with bulk in those areas to cause the wrap to be unwearable.
I had two small issues sewing this.
I wasn’t sure how high up to make the shoulder seam. You have to make room for poofy sleeves, but I didn’t want it to be too high or too low. I may have left it slightly lower than I should have, but I can always sew my next one differently. I don’t think it will be too much of a problem. I just didn’t want the pretty “V” that runs down the back to look too off. Thankfully, you use fringe trim there and that helps maintain the wide angles.
The other issue I had was the lining — and in fact, all of the layers — made it difficult to get things to line up well enough. I used a little too light lining for this project (it was perfectly priced, and a good width), and cutting the pieces was annoying. I tried to be as careful as possible and didn’t cut the fabric in layers. I worked piece-by-piece, which made things go slowly. The fabric still shifted and stretched a little. It especially caused problems in the long sleeve-tips, and where the pleats are over the bustle. Tacking those pleats in place felt like a slight fight, and I’m actually glad all the trims are there to help stitch things in place as well as cover up any ugly parts on the underside of the pleats (some of the lining sagged and twisted there).
The upholstery fabric was wonderful to cut and work with. My husband picked it out (I’m really loving taking him fabric shopping with me). I actually have some left over and only wish I had a little more for something fun down the line. The felt (which was flat-lined with the upholstery fabric and treated as one) worked well enough, but was narrower than I expected. I had to piece tiny pieces where the pattern ran off the edge of the sleeve tips. It was a very easy fix, so I didn’t mind.
I mentioned the lining, especially in the sleeve tips, and I ended up having to piece those sections on as well. I pieced them up higher, so the seam wouldn’t be quite as visible. The lining had warped so much (again, I tried to be careful), that during sewing something messed up and the sleeves wouldn’t hang properly. It’s treated as a bag lining (I’m used to turning edges under and hand sewing now), so I just ripped the seams apart from the tips up to about 21 inches or so, and made a new triangle in the lining, turning things around and sealing those edges. That wasn’t too hard either (sure beat taking the lining completely off and making two new sections all over again), and fixed the weird hanging issues.
Although it didn’t call for it, I stiffened the collar with interfacing. I also used it for the black cotton panel behind the center-front opening.
I changed the pattern so it was a center-front, edge-to-edge opening using hooks and eyes (the pattern has a button closure). I used the black panel to make sure different colored garments underneath didn’t show through any gaps. I need to find a way to keep the hooks and eyes from coming undone. Since this isn’t form-fitting, the hooks and eyes might come unhooked. Someone recommended I wrap thread button-hole style around the eyes to help give a little more grip.
This was the first time I had worked with fringe like this. I didn’t expect it to stretch that much, so I had to go slowly sewing it down. I used a zipper foot, and that seemed to work well enough.
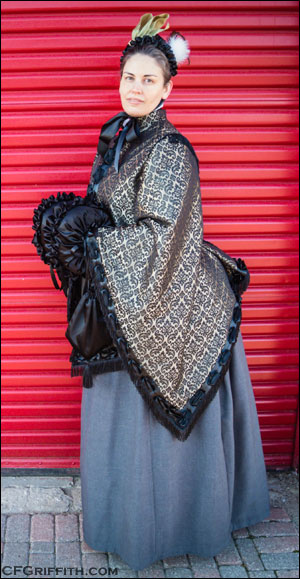
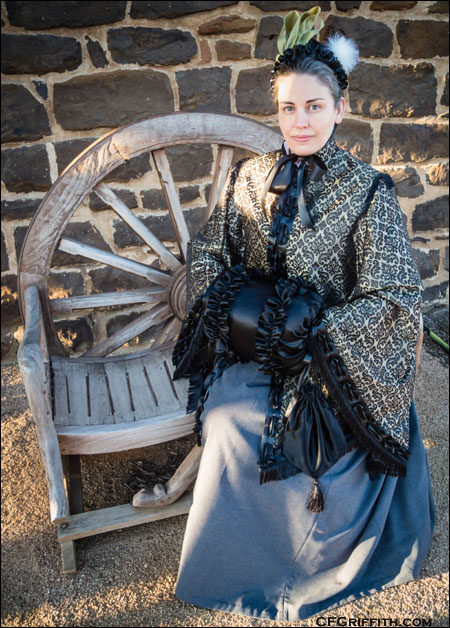
I added an extra layer of trim by box pleating a wide ribbon and adding it around all the edges, especially the center front opening. I wanted to help hide any gaps between those edges. My original plan was to use black lace, and do a jabot-style back and forth effect down the front. Sadly, I couldn’t find any lace I really liked (much less the yardage needed), so I used this trimming style instead.
Like I said, this was a fun pattern to use, and I could see making another one — possibly leaving out the felt and making a lighter wrap.
When I took these photos, the belt that ties the wrap to the waist against the back came off. I tried to find a few photos where the wrap wasn’t hanging away too badly, but I will need to take some new photos once I sew the belt down more securely. We did manage to get a few photos showing the back where it wasn’t hanging too loosely though.
Photos:
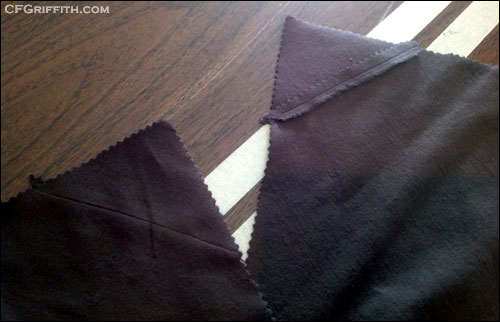
The sectioned tips, since the felt wasn’t wide enough for the biggest pattern pieces.
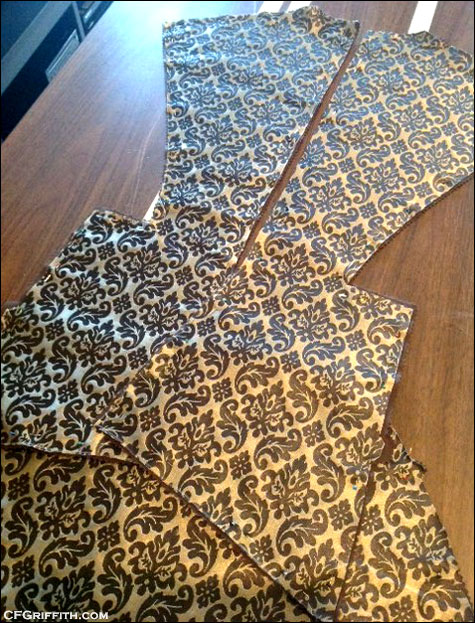
Cutting out the talma wrap pieces, and flatlining them to the felt.
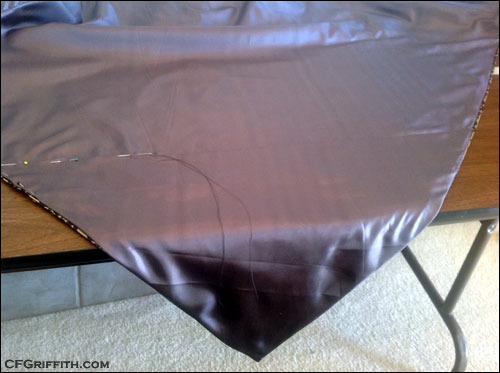
Fixing the bag lining to hang correctly. I pieced new sections in place, and made them bigger so the seam would be hidden a little better in the bulk of the wrap. I would also have more room to work if I continued having issues getting the sleeves to hang smoothly.
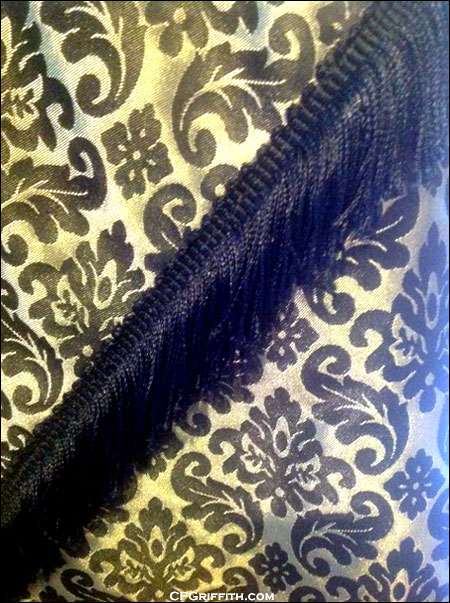
A closeup of the fringe I used to trim the talma wrap. This is the V shape part on the back of the wrap. I also used the same fringe along the bottom edge, and layered some pleated ribbon over the top of the fringe.
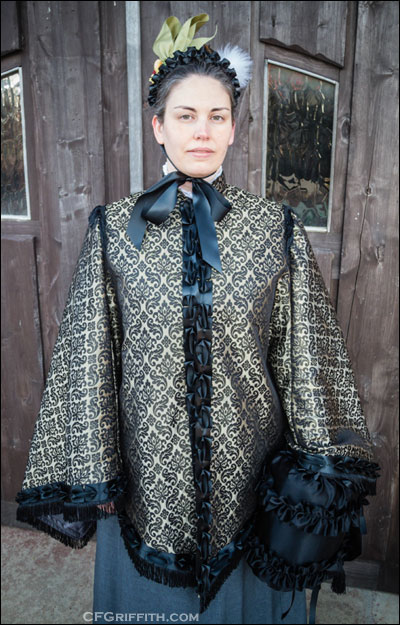
I lucked out for the photo shoot and it was actually a chilly morning so I could test out how warm these garments were. They worked just fine!
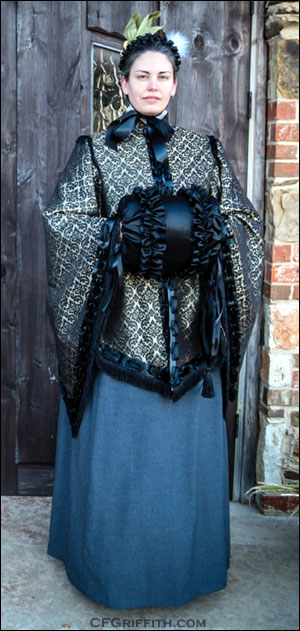
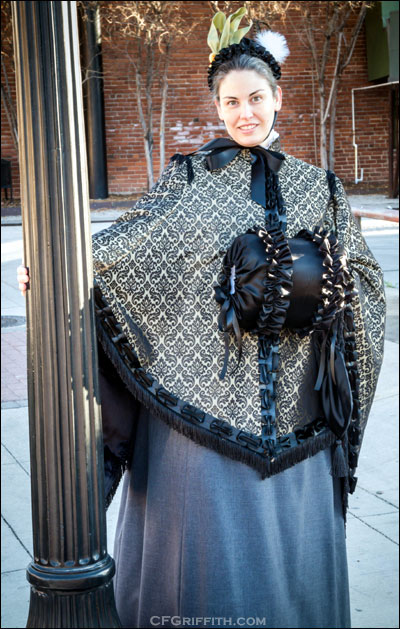
Since this is a cape-like wrap, you have plenty of room for your arms and any heavily trimmed, or awkward sleeves.
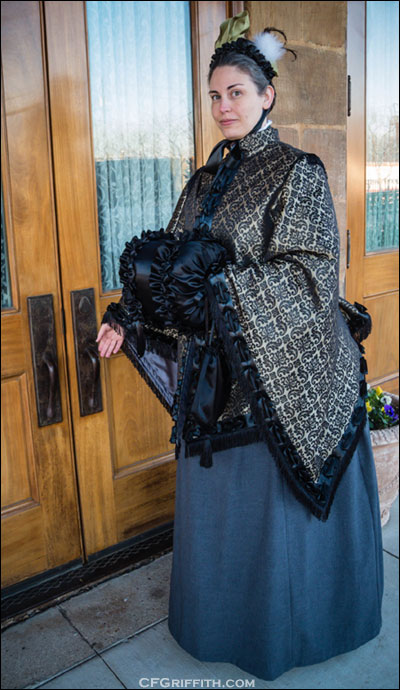
You can see a bit of the china silk lining here. My husband also picked that color out (the fabric was a little thin and warped easily, but the price and width were too nice to pass up). It’s a silver color, and it felt nice on the underside of the wrap.
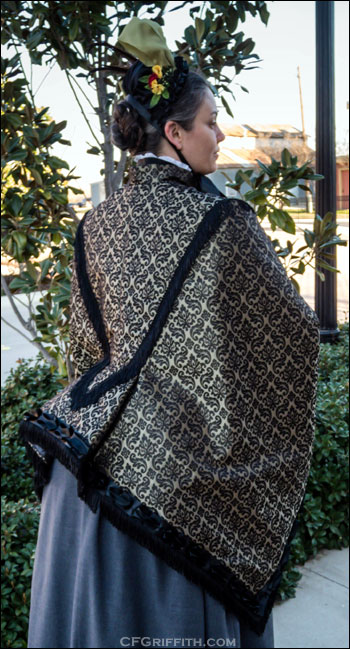
Since the waist tape belt that holds everything close in the back snapped off just before the photo shoot, we didn’t get too many photos showing the nice fit in the back. We did manage to tuck the back in enough for a few, however.
